
Motorcycle Oil & Filter Service: Top 3 Mistakes

Changing your motorcycle's oil and filter is by far one of the most important services you can do for health of your motorcycle's engine. You know that, I know that.
So why not make sure that every aspect of this procedure are spot on?
Maybe it's just me but I often feel like because of the ever present "macho motorcycle stigma", oil & filter changes are generally perceived as a overly basic service.
(which it is in the engine world)
Most people just assume that the techniques that they use to perform a job are correct. Let's be honest, nobody really likes hearing their peers say, "You mean you really don't know?!"or my favorite, "All you need is a little common sense!"
For you humbly married folk out there, you know exactly what assuming will get you.
So you don't ask questions, you don't seek advice and it only leads to heightening the risk of overlook steps to get the job done 100%. More often than not those same steps are what lead to the demise of most motorcycles on the road.

So, lets bust some pride bubbles and talk about 3 mistakes you don't want to make when performing your motorcycle's oil change.
(Generally pertaining to all Honda engines)
*Also, be sure to check out some of the links at the bottom.
I listed Some of my favorite tools and products that you might want to add to your arsenal!
1. PROPERLY checking your motorcycle's engine oil either between service intervals or directly after you complete the job.
The #1 rule of checking the engine oil on your Honda involves two things.
- Position of the bike
- Orientation of the dip stick
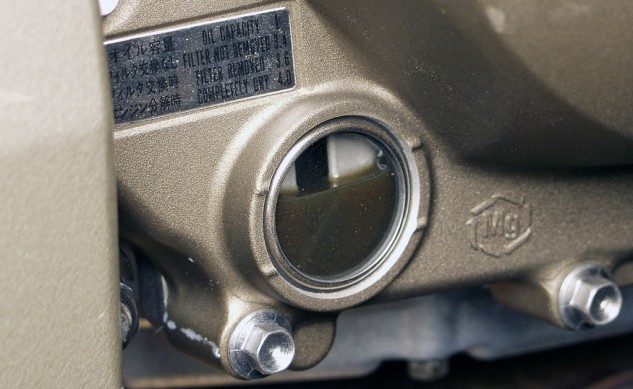
Honda likes to switch up the location of the dipstick/sight-glass from bike to bike. Some are on the left engine case and some are on the right. The biggest mistake we see in the industry is when people check their oil level when the bike is ON THE SIDE STAND.
BIG no no.
The other issue we notice is riders not knowing if the dipstick should be screwed completely in or if it should simply be placed on top of the fill hole when checking the level of your motorcycle's oil.
If you think about it, when the bike is on its side stand, depending on what side your dipstick/sight-glass is on. You will see 1 of 2 things:
-Dipstick on the RIGHT? - Oil level will read low.
*Mistakes Made - Rider thinks oil level is too low and begins filling their bike to raise the level. Typically overfilling the bike by 3/4 of a quart or more...
BAD.
-Dipstick on the LEFT? - Oil level will read high.
*Mistakes made - Rider will then drain out the oil to lower the reading on the dipstick. Resulting in a loss of oil from 3/4 of a quart or more.
Lowering the oil pressure + Lowering lubrication = Resulting in death.
*Side note* (Keep in mind that whenever somebody is mentioning parts, parts placement or direction to/on the bike. It will and should ALWAYS be pertaining to when the rider is SITTING on the bike not facing it head on)
So What Is The Correct Way?
- Your Honda motorcycle, scooter, lawn mower, ATV and SxS needs to ALWAYS be on flat level ground with the bike/unit in the upright position as if you where riding in a straight line. No and's, ifs or buts.
- Your dipstick should ONLY be placed onto the fill/check hole and retrieved.
Never screwed in.
2. Failing To Replace Certain O-rings or ONE-TIME-USE Sealing Washers When Re-installing Drain Plugs or Filter Covers.
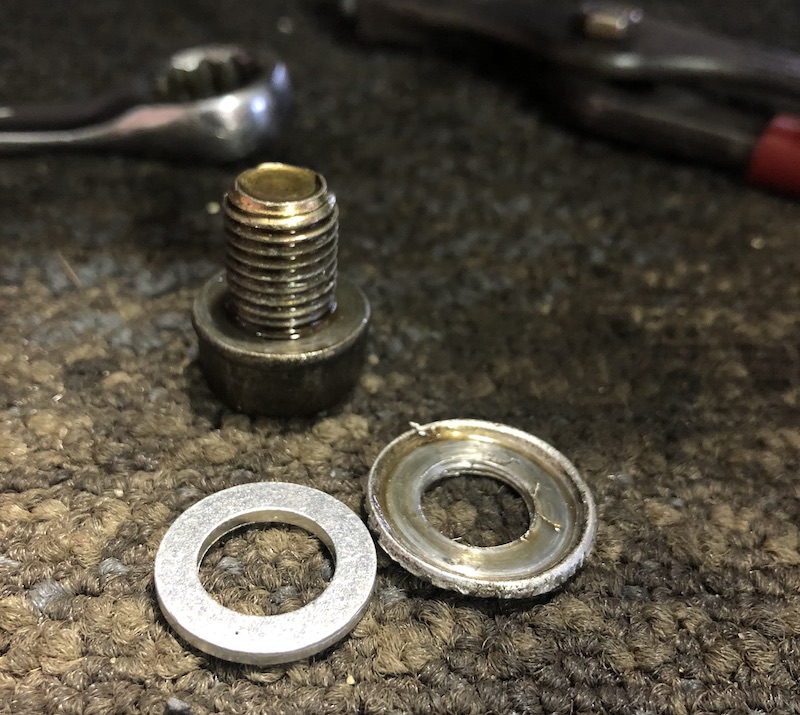
Every Honda motorcycle's drain plug will either consist of an O-ring or an aluminum crush/sealing washer. In some cases, a combination of both or multiples of the same.
Other than the obvious purposes for needing to seal such a "high-traffic" area of the motor from leaking oil, I want to show you something you may not have realized.
Specifically when it comes to the drain bolts that commonly uses the aluminum crush washer.
What riders don't often realize is how big of a role this $.80 washer plays when used in conjunction with the cases drain bolt.
The washer is comprised mainly a soft aluminum. This allows for it to be "crushed" when final torque is applied to the drain bolt. This helps with both sealing the case from oil leaks and helps maintain the integrity of the threads and mating surface of the case.
Since this area of the case's thread health is in the hands of the person doing the work. It needs to be forgiving in cases where over tightening may occur. If this area is compromised is anyway. It can be detrimental down the road.
Replacement or repair of an engine case will always be very expensive no matter what frame the engine is in.
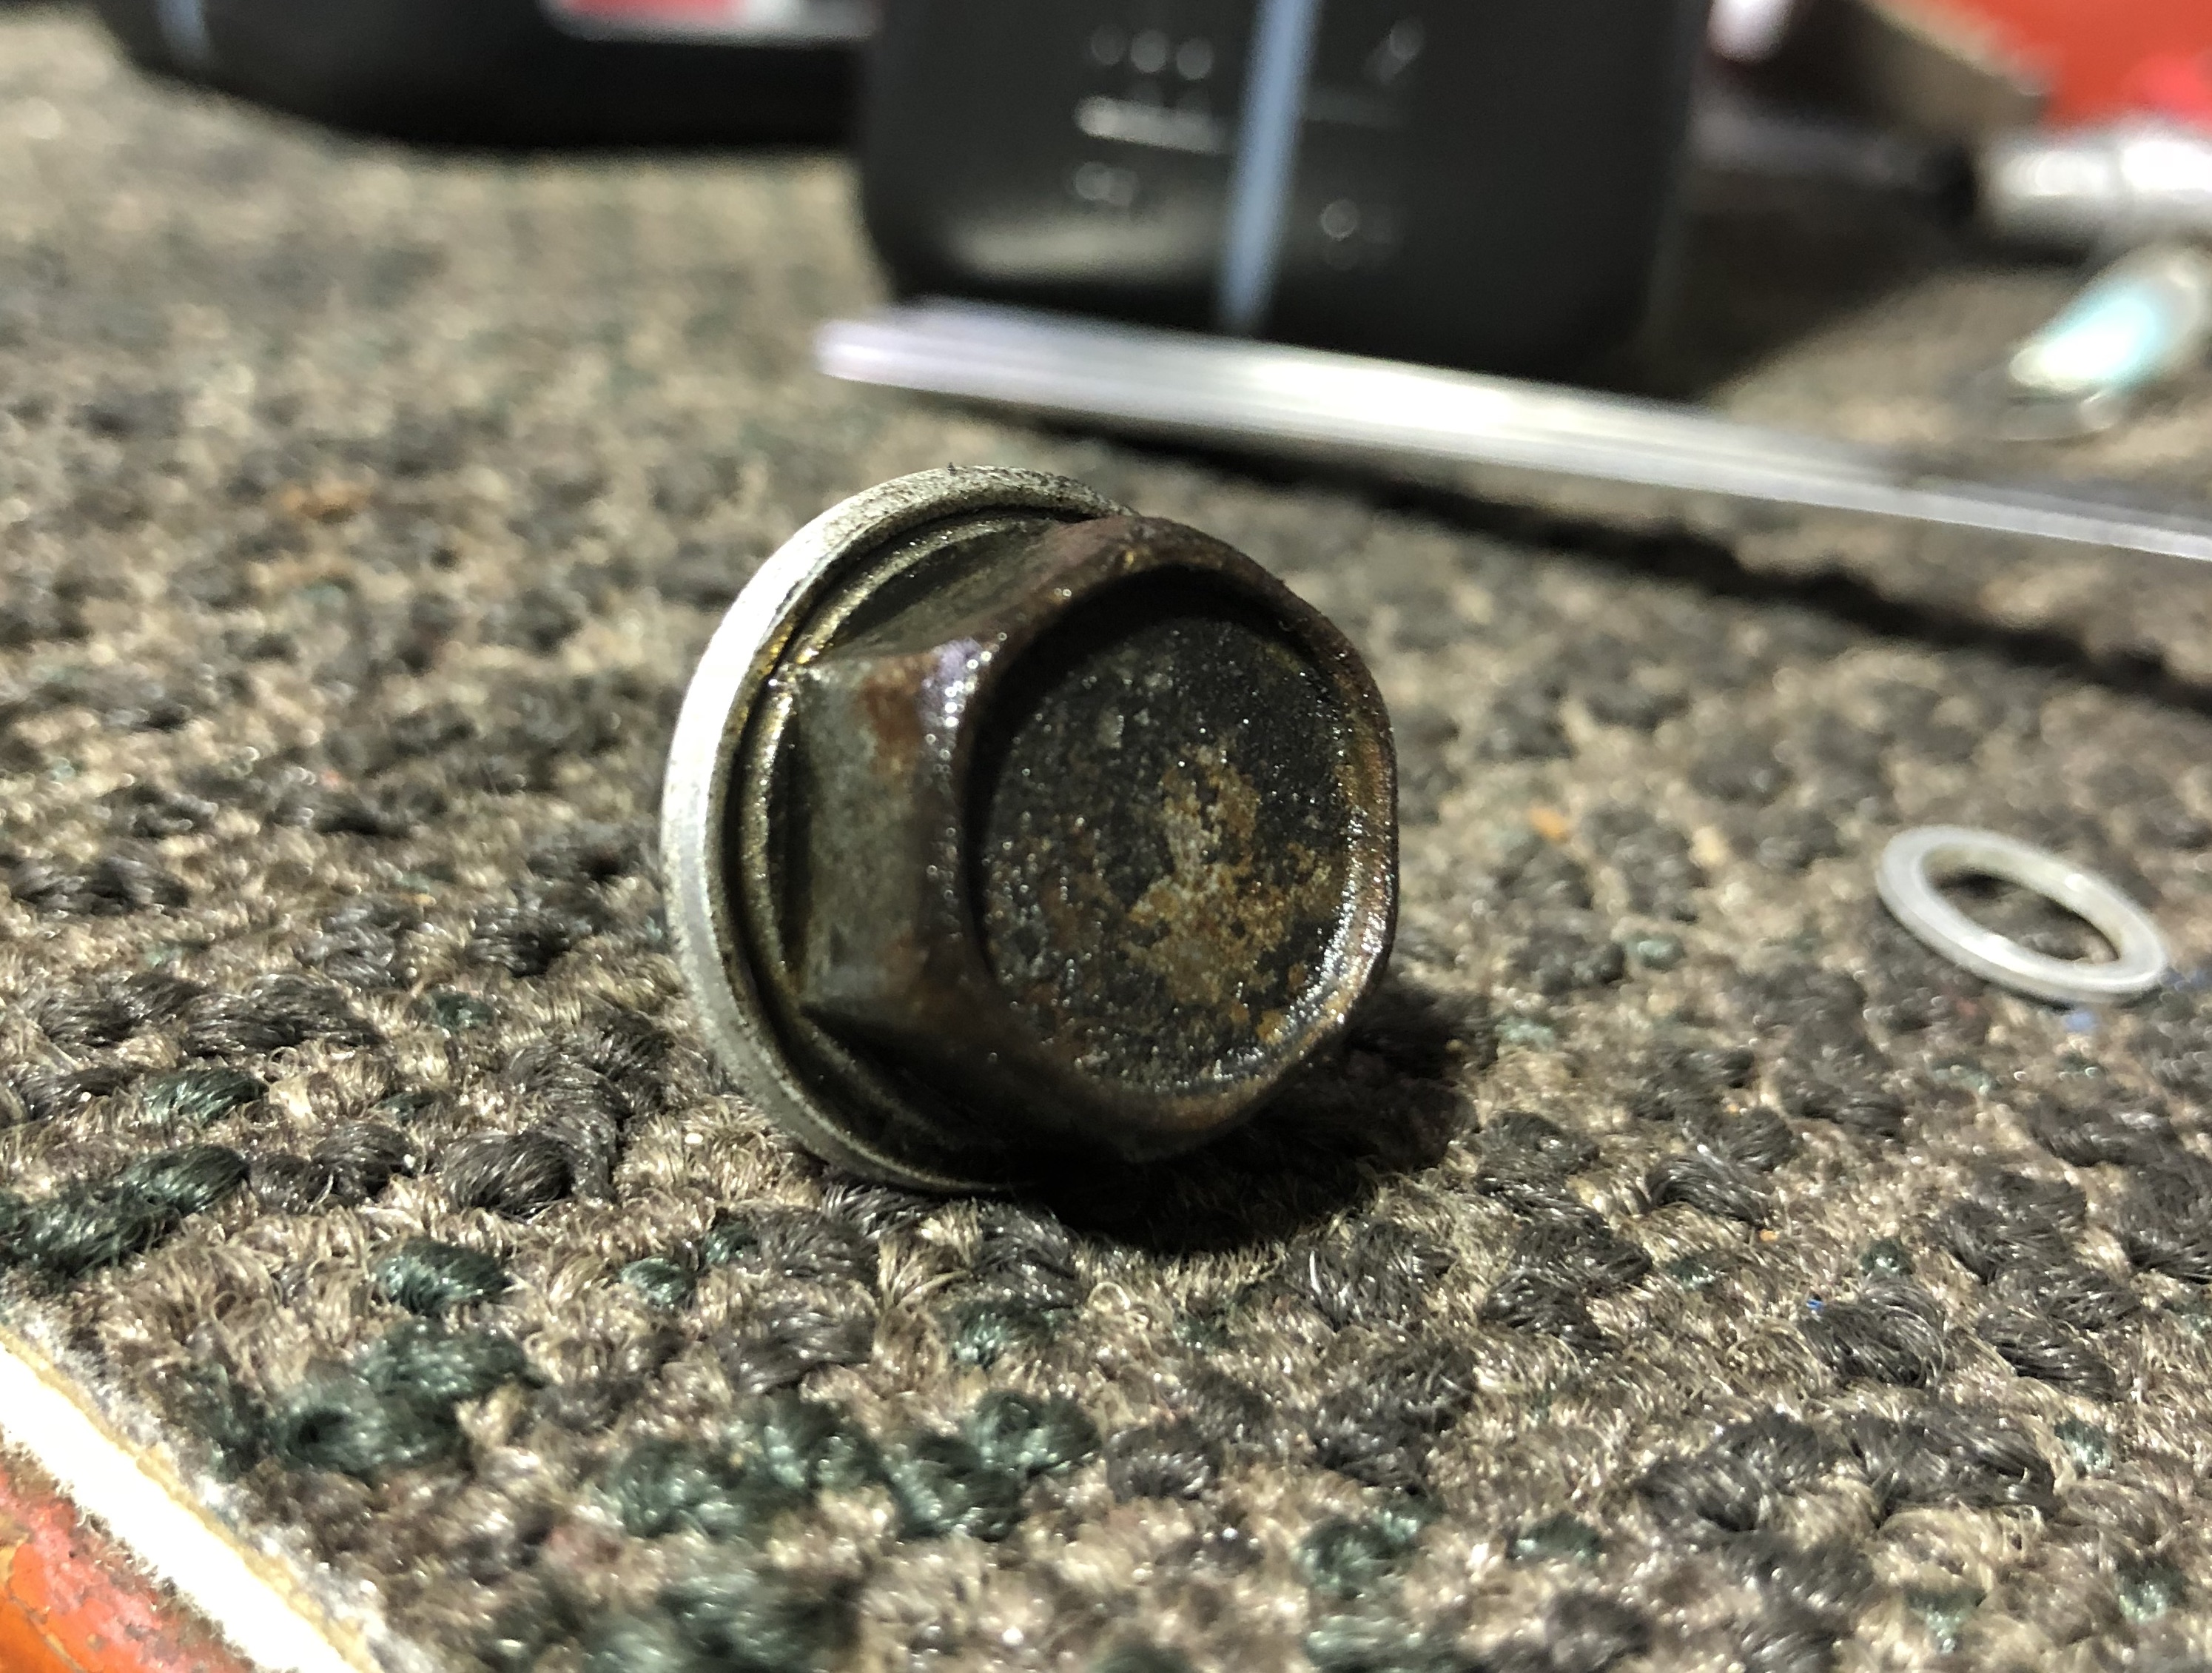
One thing you may not ever get to see, is what takes place INSIDE of the case when it comes to this important draining area. This might even come as a surprise.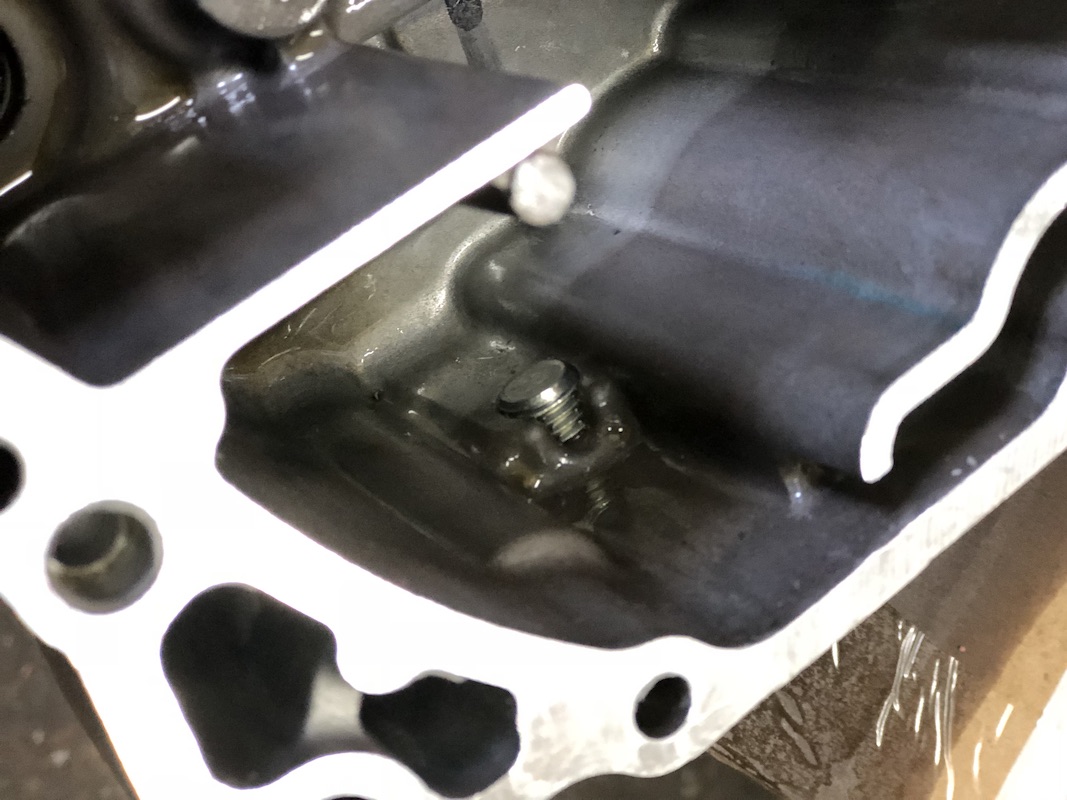
What you are looking at here is the common structure of the drain port. There is a low side and a high side to the threads "meat" to allow for efficient draining. If the low area did not exist around the threads, nasty oil sludge & engine material like clutch debris or metal, would not be able to properly drain out.
Why is this important?
Great question.
As you see in the picture there is not a whole lot of thread material readily available for you gorilla strength tighteners out there. The aluminum washer really helps out when it comes to achieving a good seal with such a light applied torque.
Think of it as slamming your head down onto your mattress vs. onto a pillow placed on your mattress. Your heads weight remains the same but with less strain on your neck.
THE MISTAKE
The bottom line is that when people don't realize the importance of using brand new washers or O-rings every time. They slowly compromise the strength of this area as well as the drain bolt. In some cases, rendering it useless without a major fix or repair.
Ever seen a rounded-off drain bolt head? I'm willing to bet there is either no crush washer under it or a completely mushroom version. I can say that because in most cases, if someone is silly enough to either use the wrong socket or apply a tremendous amount of torque getting it "Good-n-tight". They where probably careless enough to keep re-using the same drain washer or just not even know it is there altogether.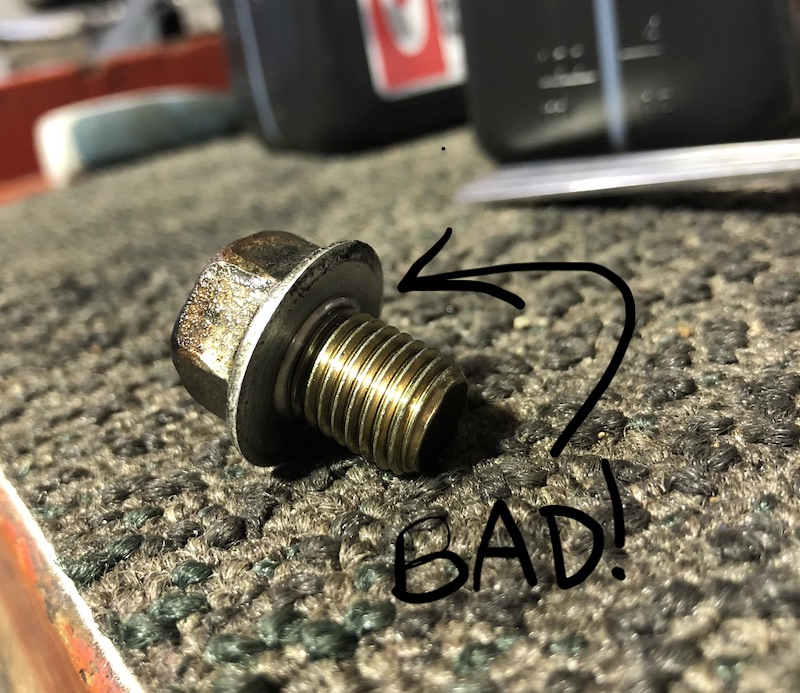
You can take this knowledge and apply it directly to O-ring style sealers/gaskets. As pressure and heat is applied to the rubber ring over time. It flattens out. Resulting possible leaks and/or over-tightened drain bolts.
Which Brings Us To Our Last & Final Mistake/Misconception of Your Motorcycle's Oil Change
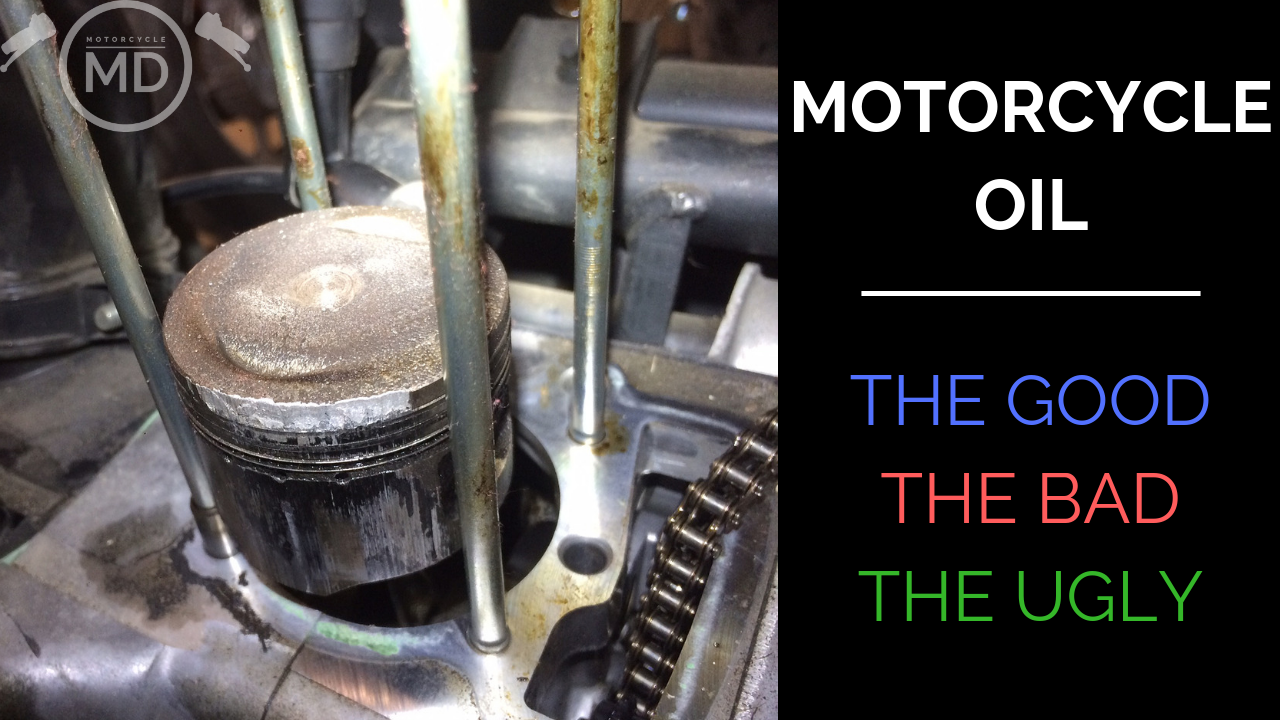
3. Using The "Wrong" Oils, Weights and Change Intervals.
You could spend months researching oils... What brands, what additives, car oil vs MC oil, viscosity, synthetics, semi-synthetics, weights and blah blah blah... Nothing shuts down what the "neigh-sayers" say faster than a quick flip to what the engineers recommend for your bike in either the owners manual or factory service manual.
You can argue product promotion, conspiracy theory's or marketing strategies until your face turns blue but when it comes down to It, it really doesn't matter.
If you follow a consistent, solid set of rules when it comes to your change intervals, the fundamental facts about what the oil should consist of and if you are even in the ball park of what viscosity to use. You will be doing your do-diligence when it comes to keeping the motor clean and healthy.
To keep me from rambling, I'd rather just show you a video I did on this topic. I don't ask you to take what I say as the Gospel. I just ask that you keep an open mind to the safe and effective facts designed to keep the life of your motor at its peek performance.
Click the Image below! Enjoy!
Here are some helpful tools and supplies you can pick up to make your oil changes a success!
- Motorcycle Oil Filter Wrench
- Shop Rags
- Honda GN4 10w30 oil
- Honda GN4 10w40 oil
- Pro Honda Oil Filter (Most common metal filter used with Honda motorcycles)
- 14mm Honda Drain Washers
- 12mm Honda Drain Washers
Stay connected with news and updates!
Join our mailing list to receive the latest news and updates from our team.
Don't worry, your information will not be shared.